With the weather too cold to make a lot of progress, here is a closer look at the design using a video walk through. Let us know what you think.
Too cold outside, so let’s look inside


Documenting and sharing our journey
With the weather too cold to make a lot of progress, here is a closer look at the design using a video walk through. Let us know what you think.

After we got the sheathing and roof panels all cut and placed, the next step is to tape the seams and put down the roof underlayment so that it can be weatherproofed.
However before we can do that we need to make sure we add about 2600!!! screws to ensure it is properly tied down. We started but have a ways to go. On the materials front, we have loaded up with many rolls of ZIP-System flashing tape, courtesy of Volstrukt.  This will cover all the seams of the sheathing and will also be used around the window frames. Putting it down in the right order so that water can always travel downward is critical.
On the recommendation from Tiny Home Builders, we also purchased heavy duty Ice and Water underlayment for the roof.  Since the roof panels are more susceptible to moisture (the center roof is regular 3/4″ subfloor grade plywood as that is where the roof top deck goes) and that is often where moisture issues start. It is such a small roof after all so two rolls will easily cover it. Again, you start at the bottom and overlap each row as you go up. For us that means we start with the center section first and we will also overlap the edges (which will have the tape on them already).
So with all this, why the tarp then? Well, we got behind in applying all the screws as Robert got a bit under the weather, but more importantly, we can’t apply the Ice and Water shield below 40 Degrees Fahrenheit (+4.5 C) and it has been freezing cold. So with snow and windstorms in the forecast for today and the possibility of sleet and rain on Monday, we had to get the tarps out again. But no more cheap blue tarps (got a great deal we thought). These are heavy duty and then took a trip to Home Depot to get 300′ of rope that we used to tie it down tight.

Winds are gusting at 40 mph, the snow is coming down, the house is all wrapped up, so we will stay inside, working on all the other items that need our attention.

With cold weather continuing, adding the sheathing and roof would be key in creating an envelope to protect the inside from the elements. Snow was in the forecast for Saturday, so we started early Friday morning. We had mostly completed the framing, adding screws and a few of the bolts. We were still waiting for a longer drill bit to come as we needed to drill through the 2×6 tubular steel frame to attach the walls with 5/8″ bolts to the trailer.
Reading through our notes from our workshop and the accompanying building manual to make sure we were all set for the next step, we realized we still had to add the hurricane straps. People in Florida know all about these as without them, roofs tend to fly off in hurricane winds. With us traveling 60-70 mph (110+ km/h) down the road, the same rules apply. Of course these came with the material from Volstrukt, so it was just a matter of climbing around the ladder and adding them every 4′. It still took a while, so we got a bit behind. We ended the day with about half the walls up.
A word about the sheathing. We chose to go with the lightweight, insulated, structural sheathing versus normal plywood. Just as discussed in our framing choice post, we did this because of weight and structural integrity. These sheets are very light, Julia and I can easily carry 4-5 sheets at a time, have a little bit of insulation value (R-3), and add tremendous structural strength as they are screwed in with a very high density of screws.
So we wake up Saturday morning to heavy snowfall. It snowed until 1 pm, accumulating about 3 inches. The rest of the day was spent blowing, sweeping, and cleaning off as much of the snow as possible.
It was now New Years Eve and we were more determined than ever to make progress. And what a day it was.  We decided to add a fire pit to the work area so we did not have to go in and warm up and it also let us get rid of some of the scrap wood we had.
The day became the day of extremes as we worked 11 hours straight outside in 12 degree F (-12 C) weather and then finished off in the Sauna at 185 degrees F (85 C). We are living the dream!
Here is a short video on our progress of the day.

I know we are in catch-up mode on the posts, so we did not accomplish all this since Wednesday night. But I feel very good about our progress in the last week.  The walls and sheathing from Volstrukt arrived late Thursday, December 22nd. Two large boxes of 1200 pounds and then a skid of sheathing for the sides and roof arrived each on a separate tractor trailer.
The driveway finished that same morning and they moved the trailer into its position. We were eager to get up early the next morning and we were fortunate to have some of the kids home to help us out. Volstrukt really does a nice job putting labels and instructions together. We laid out all the pieces around the trailer  in their respective positions. Before we began building, we made sure the trailer was level in all directions. After that was accomplished, we started to put the walls up. Instructions said to start in a corner, building out from
  there and simply connecting the panels on the trailer. We cut some foam insulation and strips of 3/4″ plywood and placed them underneath each section. This creates a thermal barrier and also ensures it is at the right height when we lay down the subfloor.
 We had flood lights going and worked until late in the evening (dinner at 10PM), but wanted to get all the wall sections at least positioned before some of the kids had to leave next morning. We also knew it would rain so we placed our tarp over the framing, erecting some long poles in a few places to ensure the water would not pool up.
Well, the idea was the right one, the execution was not as sharp. When we woke up in the morning, the poles had fallen and water was everywhere. After cleanup, we adjusted our design slightly, placing temporary roof panels to make the water run off. We also rearranged the tarp, removing excess and making it tighter. The day had been pretty rain free, but it was going to pour again that night. We went to bed exhausted but with spirits lifted and quite optomistic.
The next morning was perhaps worse than the last. There were pools of water on parts of the tarp that were still attached. The tarp was ripped in half and there were high wind warnings in the forecast for the next day. Challenges? Nah, we got this. Time to ditch the tarp. While there were high winds coming, no precipitation for 5 days. We folded all the tarp sections (good news – we now have several smaller tarps) and stored them away. We used ratchet straps to secure the walls to the trailer. Time to celebrate Christmas.
After a couple of days off we jumped back in, working on making sure all the walls were plum which meant we had to make some adjustments to the framing. Either the trailer frame was off, the measurements I had given were off, or the framing structure was off. No use arguing. There was nothing to do than to deal with it, as we needed to move on. These last couple of days have been freezing (12 degrees F this morning), but we are making great progress. I was born in Sweden, so this is just everyday weather, but I give Julia a lot of credit as she is from Portugal. She just put on layers and got out there.  The picture on the left was taken from the top of the trailer. Julia appears to have short legs and looks like “Pop” from the Rice Krispies commercial. She even made a hat from bubble wrap. Nothing seems to deter her from getting the job done. Some of the roof panels were very heavy, but that didn’t stop her. She helped me lift and screw them in. Such a trooper!! Now all is leveled, bolted down, and ready for the next step.
Here is the deal. We have tomorrow, Friday to get all the sheathing up, as it is going to snow on Saturday. Next update will be next year.
Hope you are all having a great holiday season and wishing you and your families the very best in the New Year.

It has been a while since we posted last. While we may not have had much to show, we have been very busy working through design details, discussing with various suppliers, and ordering a number of parts and components. We pushed the design limits of what we seen in a Tiny House in various areas and it resulted in us having to leave some of the more conservative suppliers behind.
With time ticking by, we knew that winter weather was around the corner and it became clear that we would not finish the envelope (basically the weatherproof walls and roof) before the cold and snow set in. So we came up with the brilliant idea that all we needed was to rent some space in an old barn, unused garage, or warehouse for a month or two. We spent about a week on that goose chase. Looked at dozen buildings, spoke to a few folks, and called and researched quite a few more. They either did not have a 14′ door way, wanted exorbitant amount of money, or were not interested in just a couple of months. We then thought of building a frame, but soon realized that would also be a lot of work and expense for just a very short window. Decision made – we will just deal with the weather.
Our trailer arrived back in November, delivered from Canada by Derek at Sierra Shipping. He was great. It was parked in the driveway and the first task was to erect the custom made steel frame that would surround our 13′ (3.9m) open span and still allow for a roof top deck.  Given it was close to 300 lbs, we enlisted our neighbor Steve to assist. We then painted it black to keep it from discoloring. It was not until the frame was up that we could finalize the measurements and complete the drawings and start construction of the Steel Walls.
While we waited for the walls, we decided that the driveway was not really the best place for this house as it was being built. Perhaps the blue tarp that we draped it in made it stand out a bit in the neighborhood. But the drive also slopes a lot, making it awkward to level and it took up a fair amount of room which made backing out of the garage a 10 point turn. So we came up with another brilliant idea. Let’s add a crushed stone driveway so we can park it in the back of the house. It would be out of the way and it can serve as a guest house when we are not on the road. Decision made.


After making the foundation (trailer) choice, the next big decision is how we are going to frame and insulate it. There are a number of options to consider. Structural strength, weight, insulation value, and ease of building to name a few.
When you consider that this house on wheels is going down the road at 60-70 mph (100+ km/h) on a regular basis, you start to realize it needs to be built for hurricane conditions.
 We started down the traditional route of stick building using traditional 2×4 dimensional lumber. This is by far the most common approach. If we needed help to build, most any local framer would be experienced in wood. It is also the least expensive choice. However, it is heavy. And it will take us some time to build, even if it is just a small tiny house. It will also take considerable care to ensure that the structural integrity is intact, especially given the fact that it will be exposed to hurricane winds. Also, let’s not forget the rooftop deck, you may remember from our design, which will need to withstand hundreds of pounds/kilos.
Second, we really liked the idea of using SIP (Structurally Insulated Panels). These are pre-built panels using plywood (or most often OSB), sandwiched around a foam core  made of expanded polystyrene (EPS), extruded polystyrene (XPS) or rigid polyurethane foam density insulation. The manufacturer constructs the entire home and then disassembles it and ships it for an easy build on site. The main advantages, from our perspective, were very high insulation values (as high as r-27 in a 4″ wall), strong structural integrity, and the ease at which we could build the frame of the house. This solution was slightly lighter than the pure stick-build but the most expensive option. Another challenge with this option is the extra work needed to route electrical wires and plumbing as the walls are solid foam. There are workarounds, but in the end we decided against it.
So then we have the steel framing approach. You see steel framing in commercial  applications all the time, but not so often in residential. It is definitely more expensive than the stick build route and finding local experienced help is not going to be as easy. However, we found these challenges were definitely overcome by its benefits. The number one reason we choose this path was due to weight and structural integrity. By our estimates, we can save close to 3,000 lbs (1,360 kg) versus the stick build. This includes using the lightweight and insulating foam sheeting on the outside. A significant factor to making this home as lightweight as possible. It is also stronger than any of the other options, easy to assemble as it also comes in prebuilt sections, and completely impervious to moisture, bugs, etc. We were sold!
So there you have it. House of steel. Can’t wait for it to arrive so we can make it a reality.

Last week we passed the gate of no return, we ordered the trailer. True to our earlier post we went with a gooseneck trailer, 26ft (7.92m) base with an 8ft (2.4m) gooseneck platform. We ended up going with Tiny Home Builders as we found their trailers had a very strong design and they were able to accommodate our special customizing features. The sketchup file of it should arrive in the next few days and the trailer itself is about 6 weeks out.
Talking about sketchup, this is some great software. When we started to come up with the idea for the Tiny house, we drew on plain paper using a ruler. We used a cm to represent a foot as that would be smaller on paper than an inch and our ruler had it marked. We still had to tape two regular sheets together to make it fit. As you can imagine, that got old really fast, but was good for some initial pie in the sky ideas. Drawing in 2 dimensions seemed natural, so we searched for some free software we could use (yes, even I admitted I could not do this in PowerPoint, which is my goto for everything). While drawing on the computer in 2-D made measurements and scale a lot easier, it became increasingly difficult to figure out the interior and how all the pieces fit together. If they even fit at all. Enter Sketchup. Very capable, priced right (free), not too difficult, and lot of fun (okay, at least addicting). But most of all, the resulting output is impressive and we can import drawings of actual appliances and designs to see how they will fit.
 So here it is. The initial look of our design. A contemporary, clean look that incorporates our many requirements. Siding is cedar (the reddish parts) and the rest is trimmed in cedar with metal panels. When we arrive at our destination, we will unhook the truck from the house and attach cedar panel skirts underneath the gooseneck creating a tiny garage for our bikes and additional equipment. In this first view, you can see the two decks, including the rooftop. We placed solar panels on the top as well as a rooftop access window that opens up fully for easy access. The main deck is 15’x8′ (4.6m by 2.4m) and is stored in two sections under the trailer during travel.
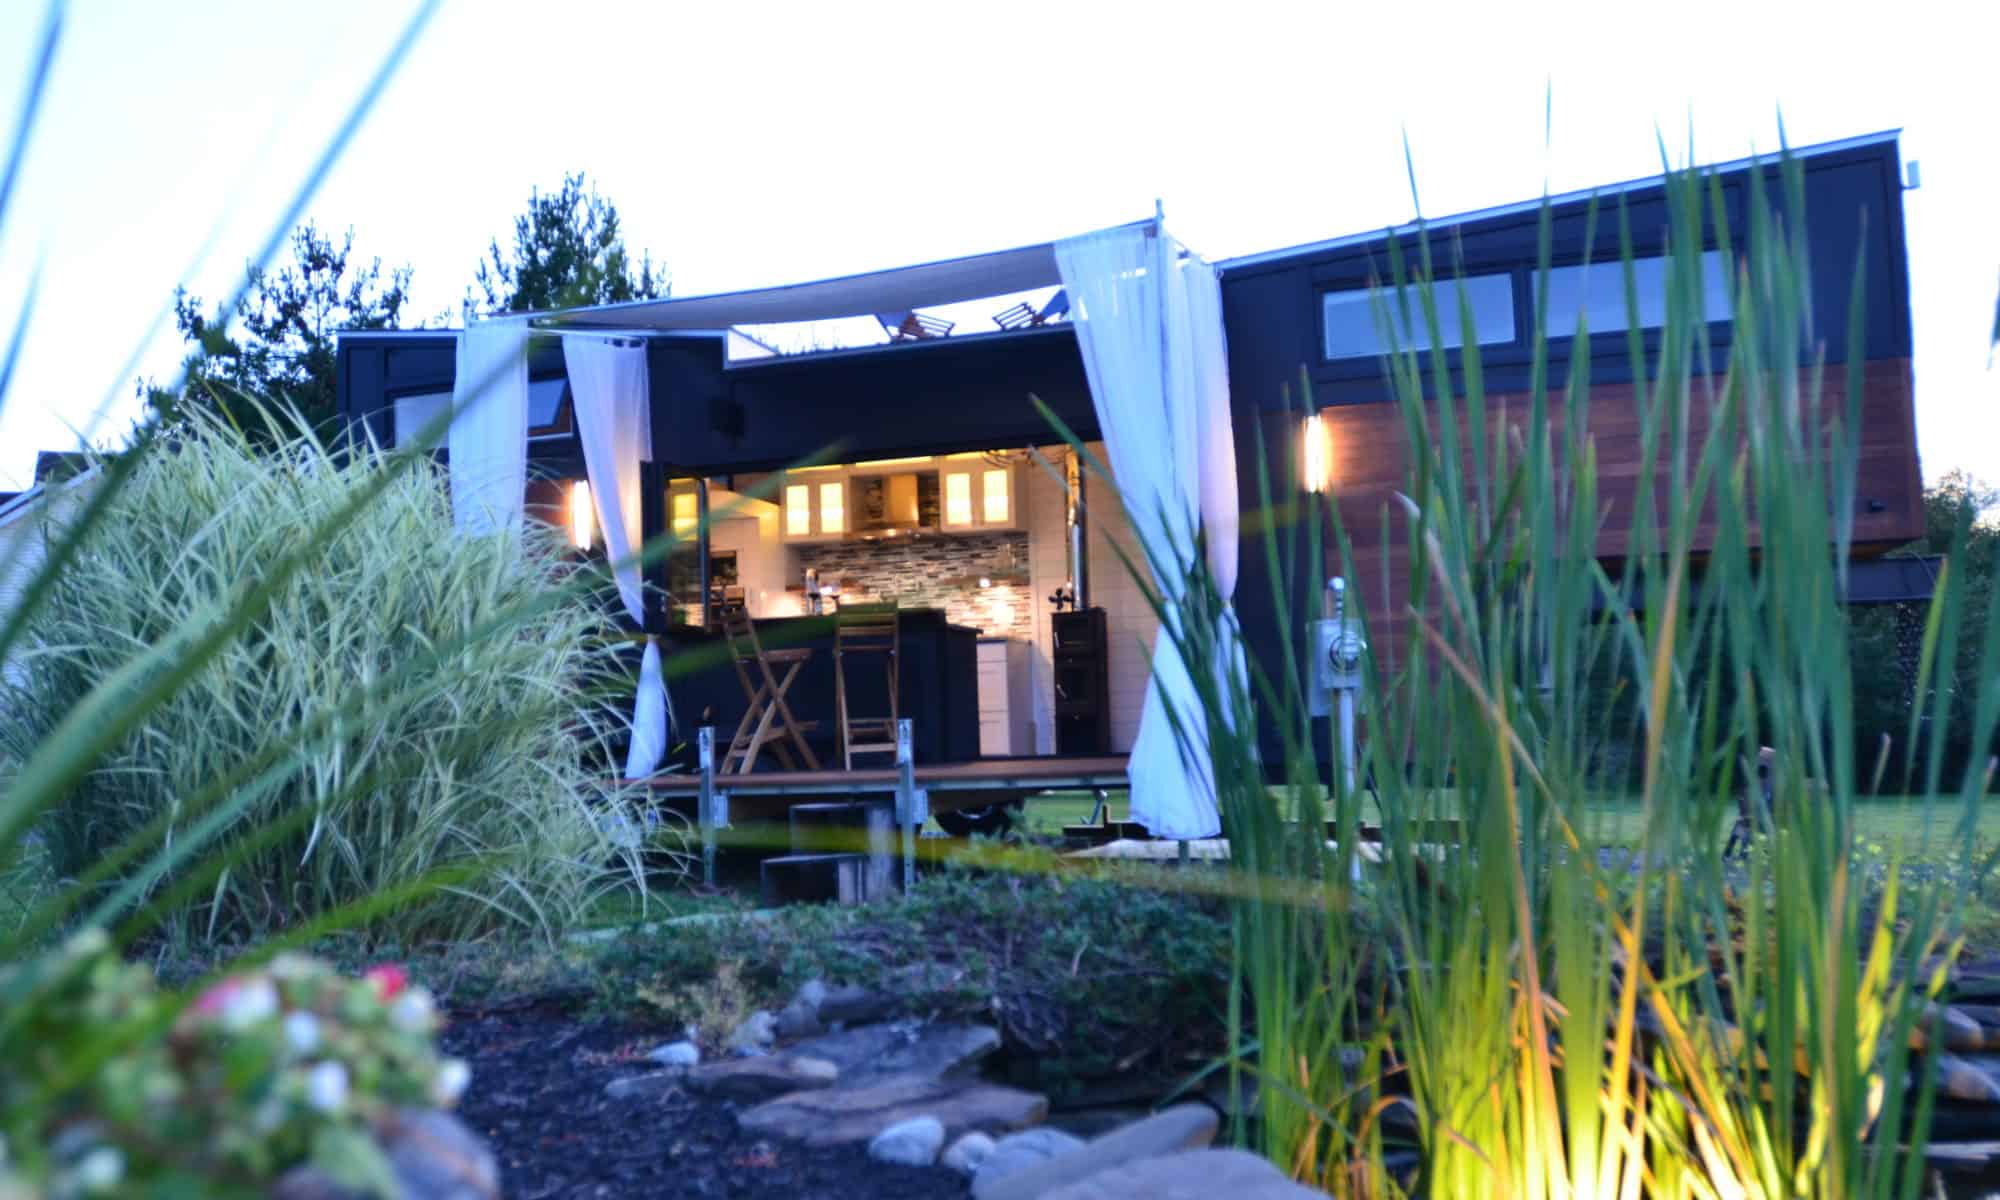
 Here is a view of the kitchen from the outside.
 This top view will give you a glance of the inside. The master bedroom is over on the right, just a few steps up a stairway. We have plenty of closet space and drawers. The reading loft also has a few more steps on it that leads to the rooftop deck. Kitchen is in the center of the home with a full size panel ready refrigerator/freezer, top of the line stove, convection oven, hood, and wood burning stove/oven combination. Adjacent to the stove is a panel ready dishwasher, farmer’s sink, and wine rack. At the other end is a sleeping loft and underneath that is a full size bathroom and laundry area.
 This shows the view from the sleeping loft across the kitchen to the living/office/dining/sleeping room. Yes this space will have multiple uses with transformational furniture, hidden features in the wall, etc.
What do you think? Love to hear your thoughts and ideas.

We just got back from the Atlanta area and the Tiny Home Builders hands on workshop. While we hoped we would learn a thing or two and had put all our final ordering of equipment to start building on hold until we return, we did not know what to expect.
 It was so worth it on so many levels. The people we met, from author/instructor Dan, his right hand man Tom, Dan’s mom Kathy and step dad Rick, to each of the participants, they were all wonderful. Their stories, their reasons for wanting to build Tiny, their ideas of how to approach various challenges were so intriguing. We had several people from Florida, whom I can only imagine how they felt as we watched the storm approaching and being covered on TV. Some were from the local area. One a New Zealander, currently living in Atlanta. We even had one person who flew in from Hawaii. There were several ex-military who captivated us with their stories and perspectives during some of the breaks. All in all a very diverse group but all with an excitement and desire to learn – learn to build a tiny house.
One thing we found very interesting was the number of people whose primary objective was to build a Tiny House and make it available on AirBnB. Young or old, these folks saw a business opportunity and wanted to get in on it.
The materials covered were great and we learned not only what will be very useful in building our Tiny home, but also in any home construction or project we may encounter. Framing, electrical, plumbing, all made simple and easy to understand. As a result, we are a lot more confident today about what lies ahead. It gave us an opportunity to validate some of our designs and ideas as well as seek creative solutions to some of our challenges. We got some great ideas on how to address the aerodynamics during towing as well as potential materials to use for our decking. We also learned about some new brands of appliances and toilets we need to look into further.
It was a great venue for us to share our design plans and get people’s feedback. We were so excited since we received positive and helpful feedback. We may have to post our plans on this blog earlier than I had first planned.

There are great videos and lots of materials out there, but to touch and feel and actually use the appropriate tools gives you a much better appreciation and understanding. You can also participate in discussions around why a certain tool over another and how to better evaluate what is right for you.
We would highly recommend this workshop to anyone, even if you want to learn or sharpen your skills to be efficiently handy around the house. I believe they even offer an e-workshop that would allow you to do some of this from the comfort of your own home.
So, now back to our tiny house. A few validations need to be made with a couple of the vendors. We need to order the trailer and the initial materials, and get any other small projects out of the way so once we start, we can dig right in.
There are so many great designs of tiny houses on wheels out there. Just go on Pinterest or Google and you are sure to find one after another. Yet, we know we wanted something that reflected our style. We live in a very traditional classic home today – so we decided to go with a more modern look. After all, we are no spring chickens, the tiny movement is all the rage among millenials, so we have to do our best to fit in.
As we started on our sketches, we had a few requirements.
Did we mention we have to do this in about 300 sq ft? Width could not be more than 8.5 ft, height no more than 13.5 ft. The one parameter we could play with was length. Oh yes, with size comes weight, which equals the need for a large man size truck to tow it. More about that later.
We did not know much about Tiny House On Wheel trailers, so at first we tried to shoehorn all this into a traditional trailer 24-26ft in length. It was getting frustrating as we always had to give up something.
It took a while, but we soon figured out that there was a whole new world out there, the Gooseneck trailer. It added 7-8ft of elevated space, usually accessible via a few steps, and it provided standing room. Voila, our master bedroom.
There are many more details we needed to decide on as well as many manufacturers to choose from, but for now we had selected our foundation choice. We since learned that a Gooseneck trailer is much preferred when it comes to towing as it is much more stable and easier to handle – great bonus.
As far as size, we started at 24ft of the basic trailer with a 7ft gooseneck. That grew to 26 ft and an 8 ft gooseneck.
Next post is about some major choices we made which impacted the rest of the design.
Hi! Olá! Hejsan!
So glad you stopped by. Thank you for taking a few minutes out of your day to read our blog. We never expected to have our very own blog until a few friends learned what we were doing and wanted to hear our story. We are excited to embark on this journey and so very happy to be able to share it with you.
The tiny house movement seems to have taken a life of its own. We have spent countless days and hours reading and watching anything “tiny”. People go tiny for many different reasons. From wanting to be debt free to living more simply with the flexibility of mobility. Thus the question, why are we building a tiny home? What is driving us to live tiny? Well, the answer is simple. It is not so much about the house (we are still keeping the big one) but rather about the experiences that we are hoping to gain by building a tiny home together.
One of the many things that attracts us to building a tiny house is the concept that we will be able to have our home with us no matter where we go. Going tiny will give us the opportunity to choose “place over space” where we will be able to explore for long stays at a time without sacrificing the lifestyle we love. Living intentionally tiny will inspire us to spend most of our days outside, creating experiences thus enjoying life to its fullest. Yet, we are determined to make this tiny home a place where we can still entertain friends and family.
Even though we have not even begun to build, it has been an amazing journey already. When building tiny, every inch, every ounce, and every kWh matters. We will share some of our thinking on the design, the choices we are making, and the progress of our build. Read on – the next post will be about our design process.