Our design process – Part 3 – how to make the tiny house HUGE

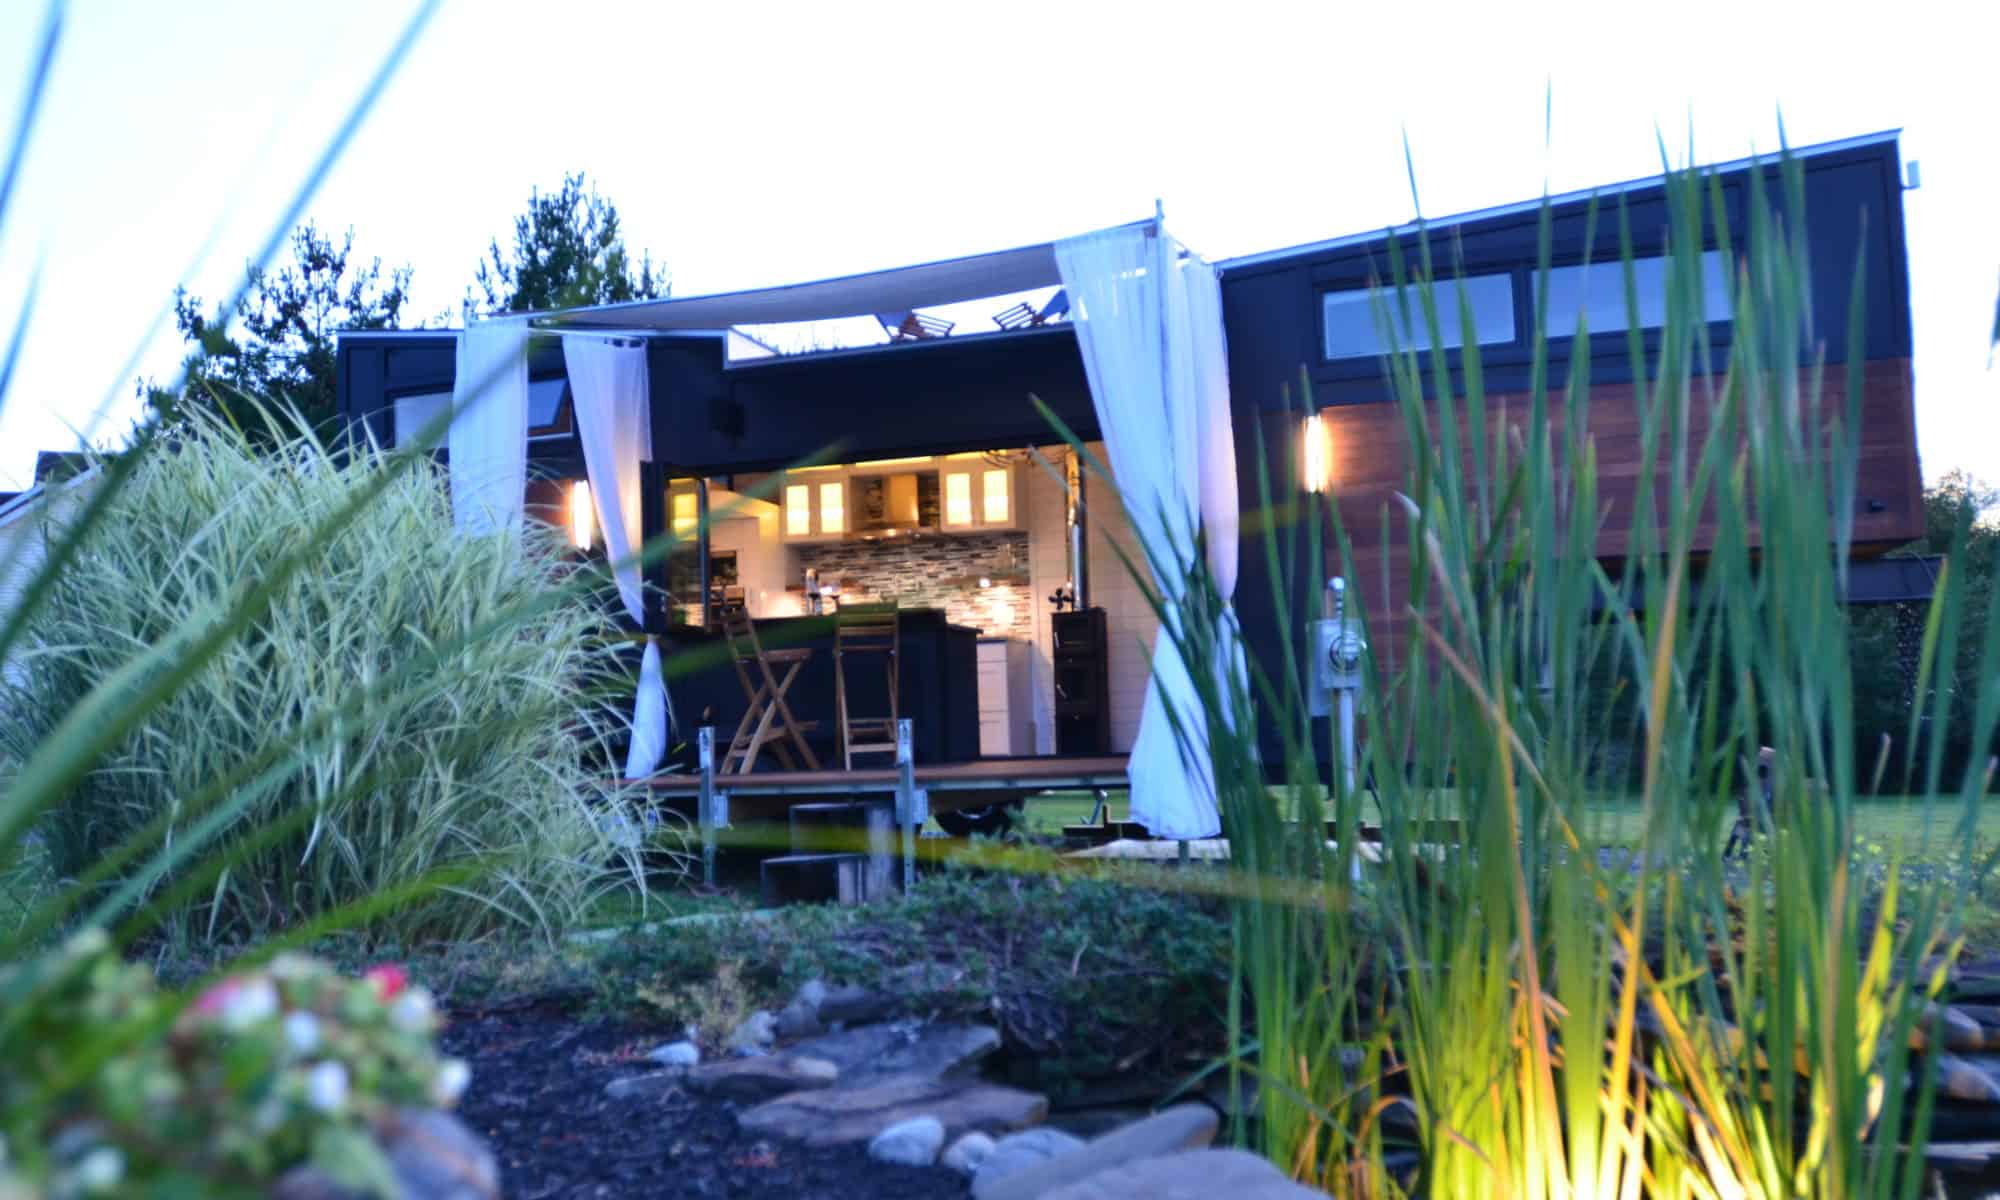
One of our key design requirements was to make a gourmet kitchen. Another was to bring the outside in.  Today we want to share what has become the center of our design, the feature around which the rest evolved, and perhaps one of the most distinctive elements of our Tiny Home.  Yes, it is the 12′ wide open window door combination. It allowed us to take this Tiny Home kitchen and open it up to the HUGE outdoors.

We had seen folding glass windows as well as folding glass doors.  There were even some very innovative uses of a glass paneled garage door to open the tiny interior to the vast outdoors.   But it was this unique combination of windows and doors working seamlessly together that truly inspired us.

The pictures here show it opened and closed. It is an approximately 12ft (3.66m) wide unit split in half doors (to the right) and windows (to the left). A key feature is that there is no center post when it is opened, leaving a completely unobstructed view.

This was not without its challenges.  First we had to find the right supplier. After some research we identified several top notch companies that engineered some very impressive bifold units. We progressed with one at a time for several weeks until for some reason or another (legal Dept worried about liability of units in moving unit, design not capable of handling potential bumps in the road, won’t be able to handle this new design in 2018, etc.) they backed out. We went through this for a couple of months and then decided to design our own. A simple two door two window design with two way hinges should do the trick. We even found a custom door designer that was willing to create a door from our idea, but their legal department also said no warranty. For what they wanted to charge, sorry, no go.

So there we were, add custom door and window manufacturing to the to do list.

One evening, before we ventured into this new endeavor, we did one more desperate search. Julia found this fairly obscure, but promising provider out of Florida. A call the next morning revealed that they were the US arm of a German manufacturer, Sunflex and they said they were up for the challenge. They made sure to incorporate steel bearings and heavy duty parts at any stress points. They even offered triple pane glass for extra strength and insulation.

That this was a well engineered product was evident. It was shipped by boat from Europe and when it arrived even the packaging was impressive.

Secondly, making sure the structure could accommodate this wide span with a deck on top was not trivial.  This is where our selection of Volstrukt and their agile steel framing paid major dividends again.   They were able to design all the right supports and reinforcements necessary to make this a perfect fit.  Tiny Home Builders, provider of our trailer, also came up huge by working with us to get the necessary steel beam to allow for that large opening.

We love how it all turned out and this picture taken from the inside really shows it off well. We are doing our best in making this tiny home HUGE. It is Tiny Living Living Large.

Next up is the metal roof, incorporating the various vents and our roof top window.

Cheers for now.

Insulation – What a difference a day makes

Sidebyside of tiny with or without insulation

Finally

The weather got warm enough so we could do our install of insulation.  Without it, we could not progress much further with the interior.  Over the last month or so, we have been watching the weather, prepping the inside, installing LOTS of wire and in-wall plumbing.

Preparation

There are quite a few items that require us to put wires, tubes, etc. through the walls.   This includes our bathroom fans, our outdoor shower unit, the Lunos  heat recovery ventilation (HRV) system, the kitchen vent, wood stove vent, and several electrical plugs.   We are coordinating the kitchen and wood stove vents with the roof installer.  This is to ensure the flashing is done just right.  The outdoor electrical outlets are just a simple wire, so we can do that at a later date.  But the rest all had to be in place.   After some back and forth, we also decided to draw speaker wires for the outdoors and the lounge.  Yes, we could go wireless, but sound is important and we wanted the option to go direct.

We figured the insulation company would cover up windows, floors, and anything we did not want sprayed.  However, having read about a few horror stories, we thought we would do our own prep too.   We thought it best to ensure all the electrical boxes, fans, hanging wire, and any plumbing lines, were all covered.

The crew arrives and insulation work begins

The day finally arrived and the Truck and Trailer of the installer smoothly backed into the driveway and started up the machinery.    There was a crew of three.  The master sprayer (he had 15 years of experience and was a bit of an artist with the spray gun) and two others who did the prep and cleanup.  Plastic sheathing went on all the windows, floors, and even the stairway and loft support pole were covered.  Nice job.

Closed Cell foam insulation is made of two separate chemicals that are heated and fed into two separate hoses.  They are mixed and combined with air pressure when sprayed onto the surface.   It expands very quickly and seeks every nook and cranny, turning solid hard within minutes.  The result – an airtight and very rigid structure.

As you can see in this picture here, proper protection is required during the application process.  However, all gasses dissipate within minutes and the resulting foam is actually biodegradable.


After the interior was done (and it took probably 4 hours), the underside of the gooseneck and a couple of spots under the trailer were also sprayed.

The wrapup

The cleanup crew now went at it, removing any overspray, cleaning the studs, and taking care of any areas where the insulation found a gap and expanded to the outside.

We had been awaiting for this day for a long time and were also very nervous, hoping  that everything would go smoothly.  Given the perfect weather we are so glad we waited rather than push for an earlier date.   Here is a summary video, including a side by side compare.

So much electrical wiring in such a tiny home

Planning

As we are leading up to the day of our insulation install (Closed Cell Foam), we had to ensure that all the electrical and any in wall plumbing was completed.  We honestly did not think that it was going to be that big of a deal.  A few lights here and there, some plugs, the appliances….   well, 500+ feet of regular wire and 500 feet of low voltage wire later, and we have one wired house.  And actually, this is just the rough in.

We started off to make a plan of where we wanted electrical plugs and switches. We then checked all the appliances and other electronic components to understand their draw and circuit requirement.  Lastly,  we drew a plan for all the lights and what we wanted controlled by our automation system.  You can see these sketches here.

The way the automation system works is that all the switches are on regular 110v and all the lights are on low voltage.  When you turn on a switch, the signal goes back to the main controller.  The controller then sends a signal to that light (or group of lights) using low voltage.   This means that every single light or group of lights you want to turn off or on, needs to have a direct feed.   It also turns out that most of the appliances suggested a dedicated electrical circuit, which meant they needed a separate wire going back to the panel.   We may have overdone it, but better safe than sorry, so we erred on the conservative side when faced with an option.

Beyond the obvious

Our water pump needs 12volt as does the fan for the compost toilet.  We are hoping to install a Orbital Shower of the Future in the fall, so it needed to be wired as well.

Because tiny houses are so well insulated with little to no air escaping, we also have to handle the natural condensation that happens.  So we installed a Lunos ductless, simple, and highly efficient heat recovery ventilation (HRV) system.  It required thermostat wiring between the main switch and each unit (one in each end of the house).   Here are a couple of pictures.

Lastly were a few speakers for the exterior which were easily wired.  We will then simply mount and connect them once we park at each destination.

Plumbing

Now for the plumbing, it was significantly simpler.  We used PEX because it is very easy and fairly fool proof to install.  (you see some of it in the main picture above) It uses red and blue tubing and a simple ring that you clamp around the connectors using a special tool.  We only had the bathroom sink, washer, pot filler, and outdoor shower to connect.  The rest is all accessible after the insulation goes in.  I will do another post on the actual plumbing with the tanks, pumps, filters, etc.  That is a whole science in itself.


So there you have it – electrical and plumbing all ready for the insulation to go in….  (postponed again for a week due to colder weather)

A few more pictures for you

Floating Stairway to heaven

Okay, after a break in our posts, it is time to get back into the swing of things.  We have a lot of news to share.  After spending some time in the skeleton of the house, using markers on the floor to show cabinet and walls, as well as walking through our 3-D Model, we made some drastic changes (more to come in other posts).  One of the more visual ones was the removal of our smaller loft which we called the reading loft.  It also had the boxed stairway going up to the roof top.   (here is the before and after – grey box on top right in first picture are the stairs).

Now with a wide open view to the upstairs, it really opens up the space.   In addition, it allowed us to design something we always talked about, but did not think we could do – a floating stairway.   As it leads to the roof-top, it made sense to call it “stairway to heaven.”

We researched the web to find a stair manufacturer, but no one had a set of stairs six feet high.  A shop in nearby Pennsylvania (next state over) looked promising and could do a custom design.  Unfortunately, after a few interactions, we were not quite convinced that they could accommodate our requirements and the price was very unreasonable.   Back to the drawing board.

Julia and I are absolutely in synch on this project and agree that there is nothing we cannot do ourselves.  So we resolved to tackle this on our own,   but we needed steel to build the brace and just as important,  an excellent welder.  To our surprise, a young kid (Neiko), running his own shop (Bulletproof Welding) said he would love to build the whole thing.  He came out to visit and we instantly liked him.  We agreed on a design and price and he said it would probably take a few weeks.  That was last week.

It was a great surprise when he sent us a video a few days later. 
He had the core laid out and wanted to show us a couple of options on how to handle the braces for the treads.  We chatted on the phone and also agreed on a modified tread design.  Two days later I got a text message asking if he could come to install the structure the next day.  Wow.

The install went smoothly, as he fabricated a bottom plate on site, welding it in place as well as created a custom clamping system that he bolted at the top to ensure it would not interfere with the Skylight installation.  Here is a video of Neiko doing the cutting.

http://tinylivinglivinglarge.com/wp-content/uploads/2018/03/img_3460.mov

The treads are wood, routed on the bottom to allow the bracket to be inset into the step.  Here you can see Neiko placing the treads on top of the metal brackets.

http://tinylivinglivinglarge.com/wp-content/uploads/2018/03/img_3467.mov

We agreed that I would do some additional routing on the edges.  We will add another piece of wood underneath and stain the treads at a later date.  To say we are thrilled with the look of our “stairway to heaven” is an understatement.

What do you think?

The not so big but important stuff

While every task and activity around building a house, even a tiny one, is a big deal, it is not every week that we see huge changes.  So this past week we sweated the small stuff – worked a lot on paperwork and research,  ran our utilities, and built the framing around the wheelwell.

There are still many decisions to be made and products to select.  Lucky for us there have been so many before us and many like us, who post their choices and reasons why.  A major next item for us is the automation system, so let us know any insights you may have.  We are also having to select our standing seam metal roof vendor.  Any recommendations or suggestions are welcomed.

We have started to receive some of our other items so we will post our thoughts and selections as we install them.  One small set back this week was our roof access window. We were all excited about installing it and found it cracked when we opened the box.  A replacement should arrive in the next couple of weeks.

As we have mentioned on our earlier posts, we will primarily be on the road with our tiny home.  However, when we are home, it will be our guest house.  We knew we needed water and electricity brought out to the tiny house (it is not always sunny enough in NJ for us to rely on solar power 100% of the time), so we had laid some piping under our parking spot.  With the deep freeze, at least temporarily over, we took the opportunity to dig the rest of the way and draw the power cable and water line.   For the water, we decide to get heated drinking water hoses and run them through 2″ (5 cm) piping.  Because we have about 80′ (24.3 m) of ground to cover, we had to get two 50′ (15.24 m) hoses, each with their electrical connection at the end.

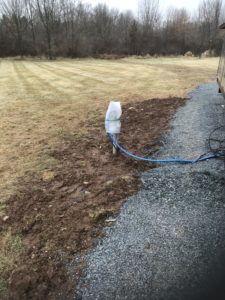
Thinking ahead,  we may want the ability to rent the space and have other tiny homes be able to park on the property.  That being the case, we went with a 50Amp 220/240v electrical line with an electric meter.  We had some help with the digging, but it still took us all day.  We are pretty happy with the results, though.


Going back inside the tiny house, we focused on the wheel-wells.  The framing sits on top of them, but they protrude further in and is just a thin layer of steel.We heard from several tiny home owners that this area is often the source of drafts and cold.  Since we are having blown in closed cell foam insulation installed, we decided to build a thin frame which would allow for 2″ (5 cm) of insulation.  Yes the walls are thicker than that, but we needed to 

minimize the depth as we have appliances that will back up right to them.  We built both frames but installed one of them thus far.


till next time….

Let there be (sun)light!

What a difference it makes to put in some windows.  Great progress over the last few days.  See the video below.

http://tinylivinglivinglarge.com/wp-content/uploads/2018/01/large.mov

Adversity brings determination and resilience

Two days ago, the weather was still a bit miserable so we spent some time inside the shell of the Tiny house discussing various options and the layout.  Our smaller loft has not been installed yet (we will probably do that after the insulation goes in) therefore we imagined its placement and where the  stairs would need to be to get up to the roof window and deck.  Suddenly, it dawned on me; there was really no way to actually walk up to the roof top window.  One would have to crawl across the loft then stand up to exit. What had I done?  I couldn’t believe I had messed this up.  Arrrrgghhh (okay, I said a few worse things….)

Julia, always so calm and collected, simply replied, “Not a problem. Let’s use it as an opportunity.  Perhaps we could mount a collapsible ladder and now enter from the main floor.  That might even be better.”

It was the end of the day so we went back in and researched various ideas for ladders using lofts and attics as keywords.  We did not find the perfect solution.  The next day we continued our other work as we had to get the roof all sealed and wrapped up. Rain was in the forecast; coming in a couple of days.   That night I went back into the office, still so agitated and upset at myself for messing up the design.  I turned on the computer and reviewed the design file to see where I went wrong.  On the design plan, the location of the rooftop window was a lot further forward than where it was on the house.  Had I missed something in my review of the Volstrukt final designs?  I opened their final drawings and they were accurate as well.  Eureka!!!  I figured it out.

“Julia,” I called. “I have some good news and I have some bad news.”

The good news was that I had figured out a solution to our rooftop window problem.  The bad news was that in our excitement to get all assembled, we had placed one of the roof panels upside down and it went unnoticed.   This meant we had to remove the roof sheathing, undo countless screws holding the roof panel, loosen the wall sheathing at the top, and unscrew four hurricane straps that held this section together.  We then flipped the roof panel and put it all back together again.

Today was an early rise and shine.  I ran off to Home Depot and Wegman’s, which both opened at 6:00AM.  When I returned home, Julia was already on the roof.  We had a great day.  Once we put the roof in its proper place, everything just worked out better.  We were now back on track.  In the process, we discovered some new ideas for storage in the roof.  Perfect!

Don’t ever let obstacles get in your way or get you down.  Think of ways to use the situation to your advantage.  When it seems you are behind the eight ball, just dig in a little deeper, try a little harder, and you are sure to get back on track.  There are no challenges, only opportunities.

Tiny baby needs to be wrapped up

After we got the sheathing and roof panels all cut and placed, the next step is to tape the seams and put down the roof underlayment so that it can be weatherproofed.

However before we can do that we need to make sure we add about 2600!!! screws to ensure it is properly tied down.   We started but have a ways to go.   On the materials front, we have loaded up with many rolls of ZIP-System flashing tape, courtesy of Volstruktfullsizeoutput_97c5This will cover all the seams of the sheathing and will also be used around the window frames.   Putting it down in the right order so that water can always travel downward is critical.

On the recommendation from Tiny Home Builders, we also purchased heavy duty Ice and Water underlayment for the roof.  fullsizeoutput_97c4Since the roof panels are more susceptible to moisture (the center roof is regular 3/4″ subfloor grade plywood as that is where the roof top deck goes) and that is often where moisture issues start.  It is such a small roof after all so two rolls will easily cover it.  Again, you start at the bottom and overlap each row as you go up.  For us that means we start with the center section first and we will also overlap the edges (which will have the tape on them already).

So with all this, why the tarp then?  Well, we got behind in applying all the screws as Robert got a bit under the weather, but more importantly, we can’t apply the Ice and Water shield below 40 Degrees Fahrenheit (+4.5 C) and it has been freezing cold.   So with snow and windstorms in the forecast for today and the possibility of sleet and rain on Monday, we had to get the tarps out again.  But no more cheap blue tarps (got a great deal we thought).   These are heavy duty and then took a trip to Home Depot to get 300′ of rope that we used to tie it down tight.

+MoJH8cNT7WwpaXnRbgspw

Winds are gusting at 40 mph, the snow is coming down, the house is all wrapped up, so we will stay inside, working on all the other items that need our attention.

Building the future…

With cold weather continuing, adding the sheathing and roof would be key in creating an envelope to protect the inside from the elements.    Snow was in the forecast for Saturday, so we started early Friday morning.  We had mostly completed the framing, adding screws and a few of the bolts.  We were still waiting for a longer drill bit to come as we needed to drill through the 2×6 tubular steel frame to attach the walls with 5/8″ bolts to the trailer.

Reading through our notes from our workshop and the accompanying building manual to make sure we were all set for the next step, we realized we still had to add the hurricane straps.  People in Florida know all about these as without them, roofs tend to fly off in hurricane winds.  With us traveling 60-70 mph (110+ km/h) down the road, the same rules apply.  Of course these came with the material from Volstrukt, so it was just a matter of climbing around the ladder and adding them every 4′.   It still took a while, so we got a bit behind.  We ended the day with about half the walls up.

A word about the sheathing.  We chose to go with the lightweight, insulated, structural sheathing versus normal plywood.  Just as discussed in our framing choice post, we did this because of weight and structural integrity.  These sheets are very light, Julia and I can easily carry 4-5 sheets at a time, have a little bit of insulation value (R-3), and add tremendous structural strength as they are screwed in with a very high density of screws.

So we wake up Saturday morning to heavy snowfall.  It snowed until 1 pm, accumulating about 3 inches.  The rest of the day was spent blowing, sweeping, and cleaning off as much of the snow as possible.

It was now New Years Eve and we were more determined than ever to make progress.  And what a day it was.  163nHYlcS4KwIszd0kHoGQWe decided to add a fire pit to the work area so we did not have to go in and warm up and it also let us get rid of some of the scrap wood we had.

The day became the day of extremes as we worked 11 hours straight outside in 12 degree F (-12 C) weather and then finished off in the Sauna at 185 degrees F (85 C).  We are living the dream! 

Here is a short video on our progress of the day.


We are very excited about 2018.  Happy New Year to all.